


Oil change for your vehicle is more than just a routine maintenance task; it’s often the first significant step many aspiring gearheads take on their journey into the world of automotive care. This seemingly small job has become a rite of passage, marking the transition from novice to someone who understands the intricacies of engine maintenance. Oil changes are crucial not only for the longevity of your engine but also for ensuring optimal performance.
Despite its importance, many people approach oil changes with a mix of uncertainty and trepidation. This guide aims to demystify the process, offering valuable insights and practical tips to make the task easier for both beginners and seasoned mechanics. Here are some key points to consider:
- Significance of Oil Changes: Regular oil changes keep your engine lubricated, reducing wear and tear and preventing costly repairs down the line.
- Building Confidence: Mastering the oil change process empowers you to take charge of your vehicle’s maintenance, leading to a greater sense of accomplishment.
- Best Practices: Like any skill, knowing the right techniques and tips can save you time and hassle, making the experience more rewarding.
By following the insights presented in this guide, you’ll not only shorten the learning curve but also reinforce best practices that will benefit you throughout your automotive journey. Whether you’re changing oil for the first time or looking to refine your technique, this article will provide the essential dos and don’ts that will streamline your experience. Let’s dive into the world of oil changes and equip you with the knowledge you need to tackle this essential task confidently.
Preparing for Your Oil Change
Before diving into the oil change process, proper preparation is essential to ensure a smooth and efficient experience. This phase not only involves gathering the necessary tools and materials but also taking key safety precautions to protect yourself and your vehicle.
Gather Necessary Tools and Materials
Having the right tools at hand can make all the difference in your oil change process. Here’s a quick list of essentials you’ll need:
- Oil Filter Wrench: Makes it easier to remove the old oil filter.
- Drain Pan: Collects the old oil as it drains from the engine.
- Funnel: Prevents spills when pouring new oil into the engine.
- Rags or Shop Towels: Useful for cleaning up any messes.
- Socket Set: Needed to remove the drain plug.
You should also ensure you have the correct type of oil and oil filter for your vehicle. Check your owner’s manual for specifications, including the recommended oil viscosity and filter type. This information is crucial because using the wrong oil can lead to engine problems down the line.
Safety Precautions
Safety should always be a priority when working on your vehicle. Here are some precautions to consider:
- Wear Disposable Gloves: Using nitrile or latex gloves protects your skin from harsh chemicals and oil. It also prevents oils from being absorbed into your skin, which can have long-term health implications.
- Protective Eyewear: Safety glasses can shield your eyes from flying debris and splashes during the oil change process.
- Work on a Stable Surface: Ensure your vehicle is parked on a level surface to avoid any accidental rolling. If you’re using a jack, make sure it’s securely placed and that you have jack stands in place for additional safety.
By taking these precautions and gathering the necessary tools, you’re setting the stage for a successful oil change. The next steps will flow much more smoothly when you are prepared and mindful of safety. Remember, being organized not only saves time but also reduces the likelihood of mishaps, allowing you to focus on the task at hand and enjoy the satisfaction of maintaining your vehicle.
The Step-by-Step Oil Change Process
Changing your oil might seem daunting, but breaking it down into manageable steps can make the process straightforward and even enjoyable. Here’s a detailed guide to help you through each phase of the oil change.
- Warm Up the Engine (But Don’t Overdo It)
Before you start the oil change, it’s beneficial to warm up your engine for just a minute or two. This simple step ensures that the oil is warmed enough to flow easily, allowing any contaminants to rise to the surface for effective drainage. However, it’s essential not to let the engine idle for too long.
- Why a short warm-up?
- It helps in stirring up any particles or sludge settled at the bottom of the oil pan.
- It prevents you from burning yourself with hot oil later on.
Once you’ve warmed the engine, allow it to sit for about a minute after shutting it off. This waiting period lets the oil settle into the pan, making the draining process cleaner.
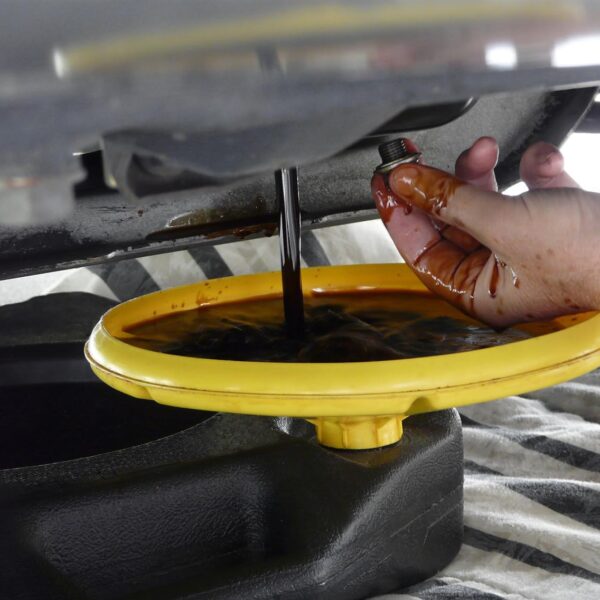
- The Drain Plug Trick
Now, it’s time to get under the car and remove the drain plug. This is where a little technique goes a long way. As you unthread the plug, apply slight pressure inward. This trick creates a seal with the threads, preventing oil from spilling onto your hand.
- Steps for a successful drain plug removal:
- Position your drain pan directly under the drain plug.
- Use your hand to unthread the plug while pushing it slightly inward.
- Once you feel it’s free, quickly pull it out in the opposite direction of the oil flow.
Practicing this technique will help you become more proficient, leading to cleaner oil changes, especially with thinner oils.
- Avoid Over-Tightening
After draining the old oil, it’s crucial to install the drain plug and oil filter correctly. Both components need to be secured, but over-tightening can cause significant problems. Many people assume that cranking down hard will ensure a good seal, but this is a common misconception.
- Best practices for installation:
- Use a small amount of clean oil to lubricate the rubber gasket of the new oil filter. This will help it seal better and make it easier to remove during the next change.
- Tighten the oil filter until the gasket makes contact, then turn it an additional three-quarters of a turn. This is usually sufficient to create a proper seal without risking damage.
- When reinstalling the drain plug, make sure it is snug but not overly tight. You don’t want to strip the threads or deform the gasket.
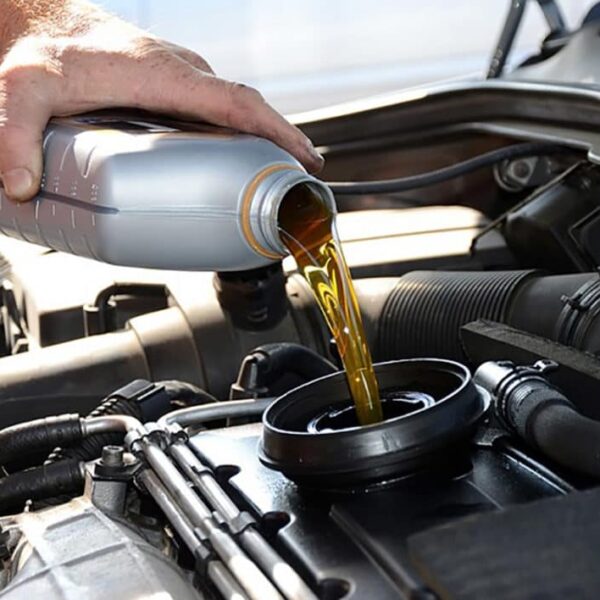
- Filling the Engine with New Oil
Once everything is securely in place, it’s time to fill your engine with fresh oil. Using a funnel is highly recommended here, as the oil fill port is often awkwardly positioned, making spills likely if you’re not careful.
- Steps for filling oil:
- Position the funnel in the oil fill neck.
- Pour the recommended amount of new oil slowly into the funnel, taking care not to rush.
- After filling, remove the funnel and wipe up any excess oil immediately.
Once you’ve filled the oil, check your dipstick to ensure you haven’t overfilled. Too much oil can lead to foaming, which can cause serious engine damage.
- Final Checks and Wrap-Up
After the oil change is complete, it’s time to clean up and perform a few final checks. First, make sure to recycle your used oil properly. Most auto parts stores will accept it for recycling. It’s crucial to avoid contaminating your oil with other fluids, so ensure your drain pan is clean before using it.
- Final wrap-up steps:
- Reset your vehicle’s oil life monitoring system according to your owner’s manual.
- Document the oil change date and mileage for future reference, whether in a service log or a digital app.
- While you’re under the vehicle, take advantage of this time to inspect other components, such as fluid levels and the condition of hoses and belts.
By following these steps, you’ll not only ensure a successful oil change but also gain a deeper understanding of your vehicle’s maintenance needs. Each oil change can be a learning experience, and with practice, you’ll become more confident in your abilities as a DIY mechanic.
Filling the Engine with New Oil
Once you’ve successfully drained the old oil and replaced the filter, it’s time to fill the engine with fresh oil. This step is crucial, as using the right amount and type of oil ensures the engine operates smoothly and efficiently. Here’s how to do it properly:
1. Use a Funnel for Cleanliness
While it may seem tempting to pour oil directly into the fill port, this approach can lead to messy spills. Instead, using a funnel is highly recommended. A funnel directs the oil precisely into the fill port and minimizes the risk of overflow. Here are some tips to ensure a smooth filling process:
- Positioning: Make sure the funnel is firmly in place before pouring. If it’s loose, oil can splatter, leading to unnecessary cleanup.
- Distraction: If you’re letting someone else pour the oil, like a young family member, keep an eye on them. A few distractions can lead to costly spills.
2. Selecting the Right Oil
Before filling, double-check that you have the correct oil for your vehicle. Consult your owner’s manual for recommendations on oil type and viscosity. Here are key factors to consider:
- Viscosity Ratings: Understand the oil’s viscosity (e.g., 5W-30, 10W-40). The first number indicates how well the oil flows at low temperatures, while the second number refers to its performance at high temperatures.
- Oil Types: Decide between conventional, synthetic, or a blend. Synthetic oils often provide better performance and protection but may come at a higher cost.
3. Filling the Engine
When it comes time to pour, do so slowly and steadily. As the oil enters the engine, it will begin to fill the oil galleries and passages. This is essential for ensuring that all components receive adequate lubrication. It’s advisable to start with the manufacturer’s recommended amount and then check the oil level:
- Recommended Fill Amount: Often listed in the owner’s manual, this is the initial target for how much oil you should pour.
- Checking the Level: After pouring in a portion of the oil, use the dipstick to check the level. This step is crucial to avoid overfilling, which can lead to oil foaming and potentially damage the engine.
4. Avoiding Overfilling
Too much oil can create serious problems. An excess amount can whip air into the oil, resulting in foaming. When this happens, the oil’s ability to lubricate the engine components diminishes, putting your engine at risk. To prevent overfilling, follow these steps:
- Check Frequently: After adding a quart, always check the dipstick. This practice ensures that you are gradually filling the engine without exceeding the recommended level.
- Final Dipstick Check: Once you’ve added the oil, allow it to settle for a moment, then check the dipstick again. The oil level should be within the designated markings.
By following these guidelines, you ensure that your engine is filled correctly and efficiently with fresh oil. This simple yet vital step helps extend the life of your engine and promotes better performance. Taking the time to do it right pays off in the long run, giving you peace of mind while driving.
Post-Change Procedures
Once you’ve completed the oil change, there are several important post-change procedures that ensure your vehicle remains in optimal condition. These steps are crucial not just for immediate maintenance but also for the long-term health of your engine.
1. Recycling Used Oil
Properly disposing of used engine oil is essential for both environmental and legal reasons. When you change your oil, you should never just pour it down the drain or throw it in the trash. Instead, follow these steps:
- Capture Oil Safely: Use a clean drain pan to collect all the used oil. Make sure the pan is free from contaminants, as mixing other fluids can make the oil non-recyclable.
- Find a Recycling Location: Most auto parts stores and many local waste management facilities accept used oil. It’s easy to find a recycling center in your area; just do a quick online search or ask at your local auto shop.
- Transport Safely: When transporting used oil, ensure that the container is secure to prevent spills. You don’t want to create a mess in your vehicle while doing your part for the environment.
Recycling used oil not only helps protect the planet but can also often be done for free or at a minimal cost, making it a responsible choice for any car owner.
2. Resetting Your Vehicle’s Oil Life Monitoring System
Modern vehicles are equipped with sophisticated oil life monitoring systems that track the condition of your engine oil. Resetting this system is an important step after an oil change, as it ensures that your vehicle’s maintenance reminders remain accurate.
- Consult Your Manual: The reset procedure can vary by make and model. Therefore, it’s a good idea to refer to your owner’s manual for specific instructions tailored to your vehicle.
- General Steps: Most reset processes involve turning the ignition key to the “on” position without starting the engine. Then, you typically press the gas pedal three times and turn the ignition off. Some vehicles may require a different combination, so be sure to verify the exact method for your model.
- Keeping a Maintenance Log: After resetting, it’s beneficial to record the oil change date. Keeping a log helps you track maintenance intervals and serves as a useful reference for future oil changes or when selling the vehicle.
Conclusion of Post-Change Procedures
By following these post-change procedures, you not only help the environment but also maintain your vehicle’s performance. Simple actions, such as recycling oil and resetting the monitoring system, contribute significantly to the overall health of your engine. These steps reinforce responsible vehicle ownership and ensure that you stay informed about your car’s maintenance needs. Taking a few extra moments to complete these tasks can save you time and money in the long run, as they help prevent future issues and keep your vehicle running smoothly.
Best Practices and Additional Tips
When changing your oil, there are a few best practices and additional tips that can make the process smoother and more efficient. While the basic steps of an oil change are fairly straightforward, incorporating these practices can ensure the longevity of your vehicle and improve your overall experience.
Utilize Downtime for Inspections
One of the most overlooked opportunities during an oil change is the time spent waiting for the oil to drain. Instead of idly waiting, use this downtime to inspect other key areas of your vehicle. Since you’re already under the car, it’s the perfect time to do a quick check of often-neglected components that don’t get daily attention.
- Check for Leaks: Look for any visible leaks around seals, gaskets, and hoses. Small leaks may not be noticeable in everyday driving but could lead to larger issues if left unchecked.
- Inspect Suspension Components: Examine the suspension for loose bolts, cracked bushings, or worn shocks. A quick visual check can catch problems before they worsen.
- Check Tire Tread and Pressure: Since your car is off the ground, it’s an ideal time to inspect your tires. Look for signs of uneven wear, cracks, or punctures. Use a gauge to ensure the tires are inflated to the recommended pressure.
These quick inspections add just a few minutes to the oil change but can prevent costly repairs down the road.
Consider Upgrading Your Knowledge
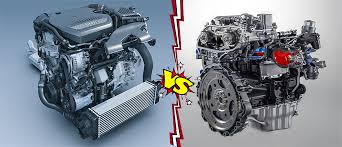
The automotive world is always evolving, especially with newer cars featuring more advanced engine technology. It’s important to stay up-to-date on the latest best practices for oil changes and general vehicle maintenance. Relying solely on old methods, like changing oil every 3,000 miles, may not be necessary with today’s oils and engines, which have greatly improved.
- Modern Oils: Most modern vehicles can go between 5,000 to 7,500 miles between oil changes, thanks to synthetic oils and better engine efficiency.
- New Engine Technology: Today’s engines have higher performance standards and require different maintenance approaches than older models. Understanding these changes ensures you’re not over- or under-servicing your car.
Additionally, connecting with online communities or reading up on automotive forums can help you learn from others’ experiences. Mechanics and enthusiasts often share useful insights, tips, and even tricks that can make DIY maintenance more manageable.
5.3 Additional Oil Change Tips
To ensure you don’t miss a step or make common mistakes, it’s good to keep these extra tips in mind:
- Don’t Overfill the Oil: Overfilling can cause oil foaming, leading to poor lubrication and potential engine damage. Always double-check the oil level using the dipstick.
- Be Patient with Draining: Allow all the old oil to drain out completely before replacing the plug and filling with new oil. Rushing this step can leave dirty oil behind.
- Use the Right Oil Filter: Not all oil filters are created equal. Using a high-quality filter that matches your vehicle’s specifications helps ensure optimal engine performance.
Incorporating these best practices not only makes the process smoother but also adds an extra layer of protection to your vehicle. By being attentive to detail, using your downtime wisely, and staying updated on automotive knowledge, you’ll keep your car running smoothly for years to come.
Frequently Asked Questions (FAQs)
1. How often should I change my oil?
The frequency of oil changes largely depends on the vehicle and the type of oil used. In the past, the standard recommendation was every 3,000 miles. However, modern vehicles and synthetic oils have extended this interval.
- For conventional oil: It’s generally recommended to change every 3,000 to 5,000 miles.
- For synthetic oil: Oil changes can often be stretched to 7,500 or even 10,000 miles, depending on the manufacturer.
Always check your owner’s manual for the manufacturer’s recommendation specific to your vehicle.
2. What type of oil should I use for my vehicle?
Choosing the right oil is critical for maintaining engine health and performance. The recommended type of oil (e.g., conventional, synthetic, or high-mileage) and its viscosity are usually specified in the vehicle’s owner manual.
- Conventional Oil: Suitable for older vehicles or those with simpler engines.
- Synthetic Oil: Ideal for high-performance and modern engines due to its superior protection and longevity.
- High-Mileage Oil: Designed for vehicles with over 75,000 miles, offering added protection for aging seals and components.
When in doubt, refer to your owner’s manual or consult with a trusted mechanic.
3. Can I change my oil without using a lift?
Yes, you can change your oil without a lift, but you will need some method of raising the vehicle to safely access the oil pan and filter. A set of ramps or a sturdy jack with jack stands works well for most DIYers.
- Ramps: Drive the car onto ramps for easy access to the underside.
- Jack and Stands: Use a jack to lift the car and securely place it on jack stands before getting under the vehicle.
Safety is key—ensure the car is stable before starting your oil change.
4. How do I properly dispose of used oil?
Recycling used oil is not only environmentally friendly, but it’s also required by law in many places. Most auto parts stores and service stations will accept your used oil for proper disposal.
- Use a clean, uncontaminated drain pan to collect the oil.
- Pour the used oil into a sealed container, like the one the new oil came in.
- Take it to a designated recycling facility, usually found at local auto parts stores or waste disposal centers.
Never dispose of oil by pouring it on the ground, in drains, or trash, as this can cause serious environmental harm.
5. What happens if I overfill my engine with oil?
Overfilling your engine with oil can cause severe issues. When there’s too much oil, the engine’s crankshaft can whip the oil into foam, which reduces its ability to properly lubricate the engine components.
- This can lead to oil starvation and damage internal parts.
- Foamy oil won’t properly coat engine parts, increasing wear and tear.
If you suspect you’ve overfilled the oil, check the dipstick. If it’s too high, drain some oil until it reaches the correct level.
By addressing these common concerns in an FAQ section, your blog post becomes a more comprehensive resource. This makes it more valuable to readers and increases your post’s likelihood of ranking for related long-tail keywords. Each question you answer helps reduce reader confusion while enhancing their confidence in performing a DIY oil change.
6. What tools do I need for a DIY oil change?
A DIY oil change requires a few basic tools, most of which are affordable and easy to find. Having the right tools on hand makes the process smoother and reduces the chance of errors.
- Oil filter wrench: Helps to remove and install the oil filter.
- Drain pan: Collects the old oil during the change.
- Funnel: Prevents spills when adding new oil.
- Socket wrench: Used for removing the oil drain plug.
- Nitrile gloves: Protects your hands from chemicals and oil.
- Car jack and stands or ramps: Lifts the vehicle to provide enough clearance to work underneath it.
These tools are essential for any DIY mechanic. Investing in quality tools ensures you can perform multiple oil changes efficiently over the years.
7. What are the signs that I need an oil change?
Even if you’re not tracking the mileage or time since your last oil change, there are clear signs that your vehicle needs fresh oil. Ignoring these can lead to engine damage.
- Dirty or dark oil: Check the dipstick; oil should be amber and clear, not dark or gritty.
- Engine noise: If you notice louder than usual knocking or ticking sounds, it may be due to lack of proper lubrication.
- Oil change indicator: Many modern cars have an oil life monitoring system that alerts you when it’s time for an oil change.
- Exhaust smoke: Excessive smoke coming from the exhaust could indicate oil contamination or burning oil.
These signs can indicate that it’s time to replace your oil, ensuring your engine continues to perform optimally.
8. What happens if I don’t change my oil?
Neglecting oil changes can have serious consequences for your engine. Over time, oil breaks down and becomes contaminated, losing its ability to lubricate and protect engine parts.
- Increased engine wear: Old oil can cause friction between engine components, leading to premature wear.
- Engine overheating: Without fresh oil, the engine is more likely to overheat due to lack of proper lubrication.
- Sludge buildup: Oil can turn into a thick sludge that clogs your engine and reduces its efficiency.
- Potential engine failure: Over time, neglecting oil changes can result in engine seizing, which could require costly repairs or even a full engine replacement.
Routine oil changes are a small investment in time and money that can save you from major repair bills in the long run.
9. How do I reset my car’s oil life monitor?
Most modern vehicles are equipped with an oil life monitoring system that needs to be reset after each oil change. Resetting this system varies between different makes and models, but the process usually involves these general steps:
- Turn the ignition to the “on” position without starting the engine.
- Navigate to the oil life reset option on the dashboard screen.
- Follow the instructions in your owner’s manual—this often involves pressing a combination of buttons or holding down the gas pedal.
- Confirm the reset, which should bring the oil life back to 100%.
If you’re unsure, consult the owner’s manual or check an online forum for your vehicle model.
10. Can I switch between synthetic and conventional oil?
Yes, you can switch between synthetic and conventional oil without causing harm to your engine. However, it’s important to consider the benefits of synthetic oil before making the switch.
- Synthetic oil: Offers superior protection, especially in extreme temperatures and high-performance engines. It also lasts longer.
- Conventional oil: Works well for standard engines and costs less, but may require more frequent oil changes.
If your car’s engine is designed for synthetic oil, it’s usually best to stick with it to ensure optimal performance.
11. Is synthetic oil worth the extra cost?
Synthetic oil is typically more expensive than conventional oil, but the benefits often justify the added expense. Whether it’s worth it depends on your vehicle and driving habits.
- Longer intervals between changes: Synthetic oil lasts longer, meaning fewer oil changes are needed, which can offset the initial higher cost.
- Better engine protection: Synthetic oil offers superior performance in extreme temperatures and better protection against engine wear, especially in newer, high-performance engines.
- Improved fuel efficiency: Some drivers report slight improvements in fuel economy due to the reduced friction inside the engine.
If you drive in extreme conditions—such as very hot or cold climates, or if you tow heavy loads—synthetic oil can be a wise investment for engine longevity.
12. What’s the difference between 5W-30 and 10W-40 oil?
The numbers in oil types (e.g., 5W-30, 10W-40) represent the oil’s viscosity, or thickness, and its ability to flow at different temperatures. Understanding these numbers ensures you’re using the right oil for your vehicle.
- 5W-30: The “5W” indicates the oil’s viscosity in winter (W) temperatures, and 30 refers to its viscosity at operating (higher) temperatures. This oil flows better in colder temperatures and is commonly recommended for many vehicles.
- 10W-40: This oil is slightly thicker, meaning it provides a higher level of protection in high-heat environments, but it may not flow as well in cold temperatures compared to 5W-30.
Always refer to your owner’s manual to determine the recommended viscosity for your vehicle based on your climate and driving conditions.
13. Why does my oil look milky?
Milky or frothy oil is often a sign that coolant is leaking into the engine, which can cause major damage if not addressed quickly. This condition typically results from a blown head gasket or a cracked engine block.
- Immediate action: If you notice milky oil, stop driving and have the vehicle inspected by a mechanic immediately.
- Cause: A mixture of oil and coolant indicates a serious issue that requires professional repair.
Ignoring this problem could lead to catastrophic engine failure, so it’s critical to act quickly.
14. Should I replace the oil filter with every oil change?
Yes, replacing the oil filter during every oil change is highly recommended. The oil filter traps dirt, metal particles, and other contaminants that could harm your engine. Over time, the filter becomes clogged, reducing its ability to clean the oil.
- New oil, new filter: Installing a fresh oil filter ensures that your new oil remains clean and effective for as long as possible.
- Filter types: Make sure you’re using the right filter for your vehicle, and always opt for a high-quality option to maximize protection.
Skipping this step can negate the benefits of using fresh oil, as dirty oil will continue circulating through your engine.
15. How long does an oil change take?
An oil change typically takes between 30 minutes to an hour, depending on your experience level and whether you’re working with a DIY setup or going to a professional service.
- DIY oil changes: For beginners, it may take closer to an hour, especially if you’re unfamiliar with the process or lack the proper tools.
- Professional services: A quick-lube shop can often complete the job in under 30 minutes, but it’s important to verify that they’re using the correct oil and filter for your vehicle.
Investing time in learning the process can save money and ensure the job is done to your satisfaction.


Author: Frank Jenkins
Frank Jenkins – Family Car Expert and Safety Advocate
Frank Jenkins, steering you towards safer and smarter family driving. Based in: New York, New York, USA
About Me
Greetings from New York City! I’m Frank Jenkins, your navigator in the world of family vehicles and automotive safety. With over 15 years of experience as an automotive writer and safety consultant, I focus on what matters most to families on the go. Through rigorous testing and detailed research, I ensure that your next family car is not only comfortable and stylish but also packed with the latest safety features.
Contact Information
Topics of Interest
- Family-Friendly Car Reviews
- Vehicle Safety Systems
- Child Passenger Safety
- Road Trip Planning and Car Entertainment
Memberships
More About Frank
Short Bio: Frank Jenkins has become a household name for parents seeking advice on the best and safest cars for their families. His reviews are infused with a parent’s concern and an engineer’s precision. Education: Bachelor of Science in Automotive Technology from the New York University Qualifications: Certified Child Passenger Safety Technician (CPST) Languages: English (Native), French (Intermediate) Previous Roles:
- Safety Feature Columnist for Family Wheels Magazine
- Technical Advisor for Safe Car Campaigns
- Host of “The Safe Family Road Trip” Podcast
Fun Fact: Frank once organized a cross-country road safety workshop, visiting over 50 cities in 30 days.
Interactive Features
- Safety First with Frank: A forum dedicated to discussing and sharing best practices for family road safety.
- Frank’s Philosophy: “The best family memories are made in cars that put safety above everything else.”
- Your Stories: A section for readers to share their family road trip experiences and car-related anecdotes.
Featured Content
Newest Articles:
- “The Ultimate Guide to Family Cars in 2024”
- “Innovations in Car Safety: What Families Need to Know”
Highlighted Content:
- “Minivan or SUV: The Great Family Debate Resolved”
- “Child Seats 101: Choosing the Right One for Your Car”
Recommended Reads:
- “The Road to Safety: How Cars Have Become Safer for Children”
- “Entertaining Your Kids on the Road: Tips and Tricks”
Multimedia Spotlight:
- Podcast: “Drive Time Family” – Discussions on making family travel safer and more enjoyable
- Video Series: “Car Seat Clinics” – Demonstrations on proper car seat installation and usage
Editorial Team & Collaborations
Frequent Co-authors:
- Emily Chen, Urban Driving Specialist
- Marcus O’Reilly, Off-Road Adventure Guru
Editorial Staff Overview: A team of dedicated writers and safety experts committed to helping families make informed decisions about their vehicles. Editorial Guidelines: We are steadfast in providing transparent and practical advice that prioritizes the well-being of all passengers.
Journey With Me
For reliable reviews, safety advice, and the best in family automotive, hit the road with Frank Jenkins at oilforcar.com


Pingback: Motor Oil Maintenance: How Regular Engine Oil Changes Save Your Engine and Your Wallet - Explore Oil For Car -Motor Oil Maintenance and Car Tips
Pingback: Maximize Performance: Expert Tips for Selecting the Right Motor Oil - Explore Oil For Car -Motor Oil Maintenance and Car Tips
Pingback: Milky Brown Engine Oil: 10 Urgent Causes, Hidden Warning Signs, and Fast Fixes to Prevent Costly Engine Damage - Explore Oil For Car -Motor Oil Maintenance and Car Tips
Pingback: Full Synthetic vs. Synthetic Blend Oil: Which is Best for Your Vehicle? - Explore Oil For Car -Motor Oil Maintenance and Car Tips
Pingback: How Cold Temperatures Affect Engine Oil: Essential Tips for Winter Driving - Oil for Car – Car Oil Reviews, Guides, & Car Tips
Pingback: Oil Filters and Their Importance in Engine Health - Oil for Car – Car Oil Reviews, Guides, & Car Tips
Pingback: 2-Stroke vs 4-Stroke Engines: Understanding Key Differences and Oil Choices - Oil for Car – Car Oil Reviews, Guides, & Car Tips
Pingback: Engine Oil Recommendations for Turbocharged Engines: - Oil for Car – Car Oil Reviews, Guides, & Car Tips
Pingback: How to Extend the Life of Your Turbocharger: 7 Essential Maintenance Tips - Oil for Car – Car Oil Reviews, Guides, & Car Tips
Pingback: Best Heavy Duty Engine Oil for Your Diesel Engine - Oil for Car – Car Oil Reviews, Guides, & Car Tips